Keen Galaxy Modding Tutorial (source code based)
| This page is still under construction! |
This tutorial aims to teach Keen:Galaxy Source Mod modding in terms of what is different from modding without source code. It will primarily cover tool usage and the new options provided by the supplied source code package and its modification. Creating a full source mod requires some basic coding knowledge that this tutorial will not cover, but it will explain where and what needs to be coded and provide limited code examples for common tasks and features.
For general, introductory Keen Galaxy modding information not covered here, please consult the patch based Keen Galaxy Modding Tutorial.
- Note: This tutorial was written with Windows users in mind. Linux and MacOS users might need to install WINE in order to run a couple of Microsoft Windows s based tools and script/batch files.
Setup
Downlad the core Keen:Galaxy Source Modding Package (link needed). This bundle contains a source code package with a number of pre-setup tools and files. Make sure to extract all files and keep the pre-defined folder structure. To facilitate modding, this package contains all resources present in their decompressed format.
Tools
This is the complete list of tools used for source modding:
| Tool Name | Usage Description | Additional Note | |
|---|---|---|---|
| Abiathar | Level & Tile Property Editor, Sound & Music Import/Export | Version 2.11.4 Beta 1 or higher is required | |
| Borland C++ Compiler | Source Code Compiler | Borland 3.1 is used to compile the code; a Borland 3.1 project file (SRCMOD.PRJ) has been included for this purpose. Borland compilers can be invoked in a 16-bit DOS environment (e.g., DOSBox v0.74 has been successfully used). | |
| DOSBox | Emulator for MS-DOS Environments | ||
| KeenScr | Intro/Outro Graphic Text Editor | ||
| IMFCrush | Optimizing IMF music files | ||
| MIDI2IMF | Converting MIDI music files to IMF | ||
| MS Paint or GIMP or PhotoShop | Drawing Tools | One of the simplest tools for modifying Keen graphics is MS Paint. However, only the versions of MS Paint prior to Windows 7 will function with the Keen palette correctly. | |
| TliExtend | Tileinfo Extension | This tool is a command line based tileinfo extension utility for Abiathar. | |
| uGrab | Graphics Import/Export | Functions as an EGAGRAPH.CKS editor. Two batch files are included for easy import and export of graphics. | |
| WDC | Sound Effect Editor | This tool was designed as a modding suite, however only the sound editor will be used. |
Modding Package
The modding package contains, amongst others, the following folders:
Base Folder Name
This folder contains the following files:
| File Name | Description | Additional Note |
|---|---|---|
| audio.asnds | Abiathar definition file for audio. | This can be modified in a text editor for adding additional music and sound effects to AUDIOHED.CKS. |
| AUDIOHED.CKS | Container file for audio chunks/files. | |
| AUDIOT.CKS | Audio location pointers for AUDIOHED.CKS. | |
| ega.def | UGrab definition file for graphics and text. | This can be modified in a text editor for adding additional graphics and texts to EGAGRAPH.CKS. |
| EGAGRAPH.CKS | Container file for graphics and text chunks/files. | |
| EGAHEAD.CKS | Graphics and text location pointers for EGAGRAPH.CKS. | |
| EGAINFO.BMP | Graphic for infoplane. | |
| ega-in.bat | Batch script to import graphics and text. | |
| ega-out.bat | Batch script to export graphics and text. | |
| MAPHEAD.CKS | Container file which stores levels. | |
| maps.adep | Abiathar definition file for levels. | |
| MAPTEMP.CKS | Level location pointers for MAPHEAD.CKS and tile properties. | |
| SRCMOD.EXE | Game executable. |
AUDIO
This folder contains the music and sound effect files in their decompressed format. Compressed, these are stored in the AUDIOT.CKS container file.
EGA
This folder contains mainly graphic and text files in their decompressed format. Compressed, these are stored in the EGAGRAPH.CKS container file.
SOURCE
This folder contains everything source code related written in the high-level language C/C++. SRCMOD.EXE is the compiled executable.
Engine Information
In contrast to classic modding via patches, working with the source code allows much more freedom. Nevertheless, there are some limitations that must be taken into account.
For several reasons DOS only allows a maximum amount of 640KiB of memory available to programs. Therefore DOS (and maybe some drivers) as well as the game program and most of the game data (levels, music, graphics) must fit into these 640KiB.
The game engine organizes certain segments into memory blocks with an upper limit of 64KiB. This means that the number of music tracks, sprites and tiles is limited to a certain degree. Realistically music and levels are the only parts (besides, perhaps, the sprite info block) where the 64KiB limit could be problematic.
Here are some basic limitations:
- Audio: each sound and each piece of music must not be larger than 64KiB.
- Levels: also referred to as map-planes, each of these must not exceed 64KiB. For details, see the below section on level limitations.
- Tilesets: There is no concrete upper limit for the number of tiles a tileset can have. The only requirement is that the MAPHEAD and EGAHEAD must be smaller than 64KiB each in order to be loaded into memory correctly. (Theoretically a little more than 7,200 tiles per tileset are allowed.)
- Sprites: The maximum number of sprites in the EGAGRAPH file is limited to 3640. If more sprites are inserted, then the data block with the sprite info (width, height, hitbox, shifts, etc.) will be larger than 64KiB.
Note: Some of this is not set in stone. In ID_RF.H some of these values can be adjusted, but this would then consume more memory.
Graphics and Texts (EGAGRAPH)
The EGAGRAPH.CKS file (aslo called the EGA graphics library) functions as a container the stores compressed sub files which are individually called chunks. Chunks in this container include all graphics, demos, fonts, sprites, tiles, texts and other game files.
The EGAHEAD.CKS file contains information about the size of the EGAGRAPH.CKS file and the offset location of each chunk. (For further reading, the moddingwiki page about EGAGraph_Format holds more technical in-depth info.)
The modding package already comes with a standard set of extracted graphics and text files from EGAGRAPH.CKS the can be found in the EGA folder. Likewise, a definitions file (ega.def) add ega.def to the package has been added to the setup. If additional files, such as graphics or sprites, are to be added to the game, the definitions file must be updated. The tool uGrab is used to read this definition file and import/export the changed or new files into/from the EGAGRAPH.CKS container.
To begin editing graphics and most texts found in the game, go to the EGA folder. You can edit any of the images how you want but must follow two rules: you must use the original 16 EGA Keen colours, and all images must have a width that is a multiple of 8 pixels.
All the image, text, and other files within EGA are arranged in clusters by file type. The following table gives an overview of each file type, and you can can find a corresponding overview in the ega.def definitions file as well.
| File Name | Description | Additional Note |
|---|---|---|
| CKS_ansi_*.bin | Final screen | Appears after quitting the game. |
| CKS_fon_*.bmp | Font sheets | These fonts are used throughout the game. |
| CKS_pic_*.bmp | Main menu and help section images | |
| CKS_sprite_*.bmp | Sprite images | |
| CKS_sprites.txt | Sprite definition text file | Hitboxes and offset values are defined for each sprite. |
| CKS_terminator_* | Terminator text sequence | Appears at the games first start and leads to the title screen. |
| CKS_tile8*.bmp | Drop-down menu Tilesets | These tilesets contain numerous tiles. Each tile has a size of 8x8 pixel. |
| CKS_tile16*.bmp | Fore- and Background-Tileset | These tilesets contain numerous tiles. Each tile has a size of 16x16 pixel. |
| CKS_txt*.txt | Text sheets | Containing story element texts and help section information. |
| CKS_txt_STARWARS.txt | Scrolling story text | The so called Star Wars Story Screen. |
| CKS_DEMO*.CKS | Demo recordings |
Import and Export Files
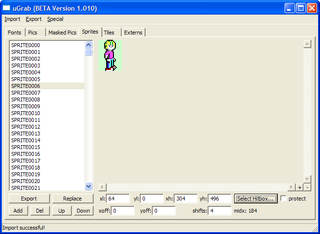
To import / export the files located in EGA, use uGrab. uGrab is an advanced EGAGRAPH editor with a graphical user interface which can not only import / export graphics, but can also add, move or remove sprites in Commander Keen source mods.
For uGrab to work, a definition file is required, which is already included within the Source Code Modding bundle. How to manually modify definition file.
To begin, open uGrab and go to Import and select Import from bitmap folder.... Locate the ega.def definition file in your project folder and open it. A dialog pops up that asks you to select the EGA folder. Do so and press OK. The graphics and text files have now been imported into uGrab.
To import these files into the EGAGRAPH simply go to Export and select Export as EGAGRAPH.... In the following window locate EGAGRAPH.CKS file and press Save. uGrab will then ask you to select a Huffman Compression Type; choose Best (Slowest). It will then ask if you want to update the definition file, which you should confirm. The new graphics and text files should now be exported into the game files.
An alternative to running an instance of uGrab is through batch files. The modding package comes with two batch files which can be used to speed up and automate the import / export process significantly. Simply double-click ega-in.bat to import and double-click ega-out.bat to export all files. To learn more about how those batch files operate, simply open them with a text editor such as notepad.
Tilesets
You can edit tiles in the typical manner, however, the first row of tiles in the foreground tileset (CKS_tile16m) is generally reserved to render certain blocking elements. Those are used for debugging reasons and should stay untouched.
Short note about tiles (16x16 pixel) for the novice modder
Reminder: inserted corresponding graphics to the tile16m file for the final modding package.
Sprite Hitboxes
Just like standard modding, CKS_sprites.txt is used for establishing Sprite hitboxes. Since we are dealing with a modified version of the source code, the last value in a CKS_sprites.txt entry, handling animation frame rate, must stay at 1. Otherwise there will be errors in the rendering. (Desired adjustments need to be taken in the source code)
Texts
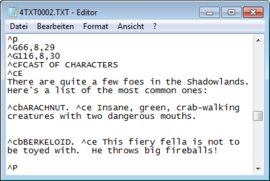
Text files can be edited with notepad or a similar application. These files include the help sections, the story, and the end-game story. They employ a formatting code:
| Formatting code | Description |
|---|---|
^P
|
Marks the beginning of a page. |
^Gy,x,n
|
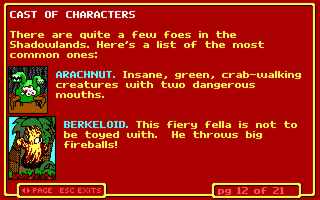
Displays a bitmap. The image number n used here doesn't match up with the image numbers in your EGA folder; OUTDATED? the image shown is the image number plus seven (n + 7). The x,y are coordinates which determine where the image appears on the screen. The ^G command can also use sprites and both types of 16x16 pixel tiles (TILE16 and TILE16M). |
^Ly,x
|
Following text will be aligned beginning at pixel location x,y. |
^Ty,x,n,t
|
After a delay of t time units (t/100 seconds?), this timestamp displays a bitmap OUTDATED? (n + 7) at pixel location x,y on the screen. |
^By,x,w,h,c
|
Fills the width-by-height-pixel rectangle at pixel location x,y with dimensions of w,h and the color c. c is the hexadecimal color digit, the rest are decimal digits. If the line ends before the parser can find a hex digit, the code will use the background color (for compatibility with Keen 4-6 texts). |
| ^Mxxx | Starts playing music number xxx. |
| ^MOxxx | Plays the music track number xxx only once, without repeating. |
| ^MP | Pauses the current running music track and allows to resume it later. |
| ^MR | Resumes music paused by ^MP. |
| ^Sxxx | Plays sound number xxx. |
| ^W | Waits until the current sound is done (does not update the screen). |
| ^Dttt | Waits ttt tics (screen will be updated) |
| ^Q | "quiet" - stops sounds and music. |
| ^H | Shows the high scores in any of the help texts. |
^E
|
Marks the end of the dialogue. |
The specific codes for changing the color of text are:
| Formatting code |
Description . |
Formatting code |
Description . |
|---|---|---|---|
^Cx changes the text to color x
|
x = single hex digit: 0-9, A-F
| ||
^CA
|
bright green text color
|
^C2
|
green text color
|
^CB
|
bright cyan text color
|
^C3
|
cyan text color
|
^CC
|
bright red text color
|
^C4
|
red text color
|
^CD
|
bright magenta text color
|
^C5
|
magenta text color
|
^CE
|
yellow text color
|
^C6
|
brown text color
|
^C9
|
bright blue text color
|
^C1
|
blue text color
|
^CF
|
white text color
|
^C7
|
light grey text color
|
^C8
|
grey text color
|
^C0
|
black text color
|
Other Texts
Some editable texts, such as level entrance messages, are not found in files within the EGA folder and instead require using a text editor to modify specific source code files located in the ../SOURCE/MAKESTR folder. To edit most text files that appear in game open up the MAKESTR.C file with a text editor. This file contains Level Names, Level Entrance Texts, In-Game Messages and related texts.
After editing these files, the game must be recompiled in order to integrate the changes. We'll get to the compiling process later.
Loading Window
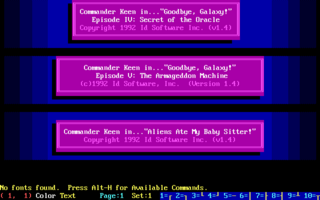
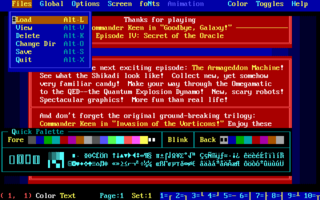
KeenScr, in combination with TheDraw, is used for editing the loading and closing screen graphics.
Where to find the loading screen files, copy it to keenscr folder
Go to commander prompt and navigate to your keenscr folder and then type:
keenscr load
TheDraw will immediately start editing the screen, with the filename keenscr.bin.
Alt+H will display the help screen with all the commands that TheDraw supports; however, its basic use is extremely simple. Use the arrow keys or mouse to select where you want to enter text, then type it in. By default, it uses bright white color over black color; you can copy a color straight from the screen by placing the cursor over any character and pressing Alt+U, and it will use that color as you type.
You can use Alt+M to enter drawing mode, where you can use the cursor keys or the mouse to draw on the screen; you should enable Draw mode with the cursor in the place where you want to start drawing, as it will start immediately. Alt+F1 to Alt+F4 will give you different line styles for Draw mode.
Once you are done editing the screen, you can save it by pressing Alt+S. TheDraw will ask which format to save it in; press B to select Binary, and enter the filename keenscr.bin. It's important that you keep this filename (overwriting the existing one). After you exit TheDraw and KeenScr notifies you that the file has been updated.
files must be copied back to origin folder. Does this require uGrab or a recompile?
Adding Additional Graphics and Text Files
Unlike standard Keen Galaxy modding, the number of text and graphics files can be expanded or rearranged in source modding.
For any additions it is required to edit the the uGrab definitions file, Abiathar's *.adeps definitions file, and GRAPHCKS.H. These files categorize the EGAGRAPH into sections of chunk types (such as bitmaps, sprites, tiles), provide the total number of chunks within a chunk section (such as the total sprite images, or total number of tiles), and include a running total chunk number used for identifying where the chunk sections begin. What is the tablestart? Whenever chunks are added to a chunk section, the running total value must be updated for all subsequent entries. For example, if 100 sprite images are added, the number of sprites is changed from the default 397 to 497, then the subsequent entry for TILE8 must be updated to 621, TILE8M to 622, and so on.
Here is the default EGAGRAPH structure:
	CHUNKS 4751
		FONT               3      3            #num, start
		FONTM              0      6
		PICS             115      6    0       #num, start, tablestart
		PICM               3    121    1
		SPRITES          397    124    2
		TILE8            104    521
		TILE8M            20    522
		TILE16          1296    523
		TILE16M         2916   1819
		TILE32             0   4735
		TILE32M            0   4735

		B800TEXT               4735 endgame
		TERMINATOR             4736 commander
		TERMINATOR             4737 keen
		B800TEXT               4738 outofmem

		TEXT                   4739 helpart1
		TEXT                   4740 helpart2
		TEXT                   4741 helpart3
		TEXT                   4742 helpart4
		TEXT                   4743 endart
		TEXT                   4744 demoart
		TEXT                   4745 helpart5

		DEMO                   4746    0
		DEMO                   4747    1
		DEMO                   4748    2
		DEMO                   4749    3
		DEMO                   4750    4
Here is a brief description of each chunk section:
| Chunk Category | Description |
|---|---|
| FONT | . |
| FONTM | . |
| PICS | These are the image files that can be accessed by the text files. |
| PICSM | . |
| SPRITES | These are the sprite animation frames. |
| TILE8 | . |
| TILE8M | . |
| TILE16 | These are the background tiles. |
| TILE16M | These are the foreground tiles. |
| TILE32 | . |
| TILE32M | . |
| B800TEXT | . |
| TERMINATOR | . |
| TEXT | These are the text files for the F1 sections and the end game sequence. |
| DEMO | These are the recorded demo files. |
Adding Bitmaps Example
Create an image file and save it as the next image in the sequence of bitmap images found in your EGA folder. By default this would be default next image file name.
Update the uGrab definitions file, Abiathar's *.adeps definitions file, and GRAPHCKS.H to reflect that there is one additional bitmap image: PICS is updated from 115 to 116, PICM's running total is updated from 121 to 122, and so on for the running totals of all remaining chunk sections.
Adding Sprites Example
Create a series of image files and save them as the next images in the sequence of existing sprite images found in your EGA folder. By default this would begin with default next sprite file name.
Using uGrab to add a sprite image
Update the uGrab definitions file, Abiathar's *.adeps definitions file, and GRAPHCKS.H to reflect that there are additional sprites image, remembering to update the running total values for the subsequent chunk sections.
Adding Tiles Example
Create a copy of tileset file name from your EGA folder and modify the copy to include an additional row of tiles by changing the canvas size. One row is equal to number of tiles.
Open the uGrab definitions file, gfx.def, in uGrab. Go to the Tiles tab and select TILE16 or TILE16M. Then select Replace at the bottom and replace the old tileset file name with your new modified one. Export the changes as EGAGRAPH and as gfx.def.
You will need to update information in Abiathar's *.adeps definitions file, GRAPHCKS.EQU, and GRAPHCKS.H to reflect that there are additional tile chunks (one row equates to number of chunks, remembering to update the running total values for the subsequent chunk sections. This easily accomplished by copying the information from gfx.def.
At this point you will need to compile a new executable file (CKSRCMOD.EXE).
Lastly, MAPHEAD.CKS must be updated using TliExtend. To do this, edit the included batch file called TliExtend.bat. This file lists the instructions for TliExtend, using default values, in the following format:
existing tileinfo file (MAPHEAD) name
current number of background tiles
current number of foreground tiles
output tileinfo file (MAPHEAD) name
new number of background tiles
new number of foreground tiles
length of non-tileinfo (MAPHEAD) data
To proceed, edit the file to include the new number of background tiles and/or the new number of foreground tiles. If you have already added additional tiles previously, you will need to change the current number of background and foreground tiles as well.
You can then run TliExtend.bat, which will output MAPHEAD--new.CKS. You will need to rename this file to MAPHEAD.CKS and copy it to your game files folder.
Level Editing (MAPHEAD)
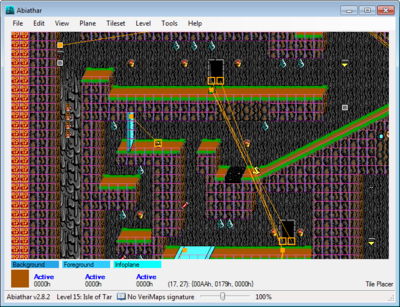
Abiathar is the most up to date and feature rich level editor for Keen Galaxy. It comes with a Documentation/Help file which is strongly recommended. It contains advanced information this tutorial cannot match. Fleexy, the author, has uploaded a video tutorial where most of the basic features are examined.
Setting up Abiathar
Open Abiathar and go to File and select Open Project. Within your projects folder you should find a dependency file called maps.adeps which you want to choose. This is your pre-setup from where you can start building levels.
To store modifications press Save under File. The settings for the levels will be written to the maps.adeps file, which only contains references and pointers to the real resources files, but doesn’t store any level data on their own.
Closing Abiathar for the first time, quite a few settings will get saved to the editor.aconf config file. Those settings are loaded when Abiathar starts.
For basic usage, consult the using Abiathar section of the patched based modding tutorial.
Memory & Technical Limitations
Each level must not exceed 64KiB: width x height (in tiles) must not exceed 0x8000 (=32,768). Rule of thumb: As long as both stay below 180, there‘s nothing to worry about.
The max level height is 250 tiles, and the max width should not exceed 256 tiles.
The greater the variety of tiles used, the more memory is used; each foreground tile consumes 128 bytes, whereas each background tile consumes 160 bytes.
There is a maximum of 50 sprites visible on-screen at the same time, but not limit for the level as a whole. Each Sprite in the refresh manager is 50 bytes. This is calculated by taking the sprite list entry (34 bytes for each sprite), and adding the erase list entry multiplied by two due to double buffering (8*2=16); thus: 34 + 8 * 2 = 50 bytes per Sprite. The number of Sprites that are in use can be checked using the F10+C cheat code in game.
Sprites may be placed on top of animating tiles, but a foreground animating tile may not be placed on an animating background tile.
There is a maximum of 100 different tile animation sequences and 100 animated tiles visible on-screen at the same time.
The song played during the level will contribute toward the overall byte size of the level.
In general, when it comes to level design, compromises may need to be made for memory purposes. For example, if you want to use a lot of different graphics in a level then you might have to make the level smaller or use a music track with a smaller file size so the game doesn't run out of memory.
Tile Properties
what is the saving process/files involved
Abiathar comes with a built in tile properties tool used to modify tile properties. To access it in Abiathar, simply go to Tools and then Tile Property Modifier. This will bring up a tiny window used in the modification process. Consult the tile properties section of the patch based modding tutorial for further instructions.
Music and Sounds (AUDIOT)
To alter music and sounds, this chapter will discuss the following files and folders: AUDIOT.CKS, AUDIOHED.CKS, AUDIO, audio.asnds, Abiathar, MIDI2IMF, IMFCrush, WDC.
The AUDIOT.CKS file functions as a container that stores compressed sub files individually called chunks. Chunks in this container include AdLib music (*.IMF, *.KMF), AdLib sound effects (*AL.SND) and PC Speaker sound effects (*PC.SND).
The AUDIOT.CKS file requires an associated AUDIOHED.CKS file which stores the offset location of each each chunk. (For further reading, the moddingwiki page about AudioT_Format holds more technical in-depth info.)
The modding package already comes with a standard set of extracted music and sound files from AUDIOT.CKS that can be found in the AUDIO folder. Likewise, a configuration file (audio.asnds) add audio.asnds to the package has been added to the setup. If additional files, such as sound effects or music, are to be added to the game, the configuration file must be updated. The tool Abiathar is used to read this configuration file and import/export the changed or new files into/from the AUDIOT.CKS container.
Brief introduction into music and sound
PC Sounds
AdLib Sounds
IMF / KMF Music
IMF/KMF format files are packed at the end of the audio file. As IMF/KMF files contain AdLib music for games that also have AdLib sound effects, care must be taken to ensure that IMF music and any sound effects can share the OPL chip without conflict. This is done by reserving the OPL's first channel for sound effects, leaving eight remaining channels available for use in IMF files.
more info about this procedure needed
It is advised to perform optimizations on existing IMF files. IMFCrush removes by default everything that drives the first AdLib/OPL channel. Generally the original IMF file is reduced by roundabout a third by converting to KMF. The reduction depends entirely on the contents of the source file. (Side note: IMFCrush is also capable of converting songs to a different playback rate, or even truncate songs.)
Music Composition
For tips on music composition as well as the conversion process to the IMF format, consult the music section of the patch based modding tutorial.
Sound Effect Composition
WDC is an older modding tool that contains a sound effect design tool. For instructions on how to access and use this tool, consult the sound effects section of the patch based modding tutorial.
Abiathar Setup and Usage
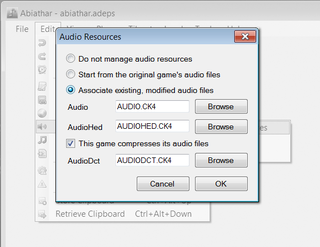
In Abiathar and with your project loaded, go to Edit, then Audio, then Resources. Select the option to select.
To change music and sounds, just replace the files in AUDIO with new files (they must be the same format).
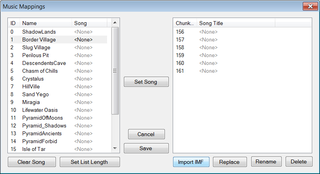
After changing the sounds or songs, go back to Abiathar and, with your project open, go to Edit, then Audio, then Import. Select your audio.asnds file. Abiathar should inform your that an import was successful.
Abiathar Configuration File
Abiathar uses audio.asnds for importing and exporting the sound and music files. It contains an entry for each song and music file in a certain format.
A pc speaker sound looks like:
?046|PC|?046PC.SND|50
The first part of this entry indicates the offset location of the sound. Next, PC indicates ???. Next is the sound file that will be used at this offset. The last digit defines the sound effect's priority; since the engine can only play one sound effect at a time this number tells it which sound has priority to play. Values can be from 00 to 99 with the higher numbers being higher priority.
An AdLib sound looks like:
?098|PC|?098AL.SND|50|6|1,48,79,0,240,96,255,1,0,0,0,0,0
As you can see, this entry begins in the same manner as a PC speaker sound, right up to the priority value. The additional numbers that occur after are instrument information that can be ignored (the source engine does not actually use these values), however, Abiathar requires placeholder numbers to be included (any values will do).
Additional Music and Sound Effects
Sound effects and music must occur sequentially in the numbered list found in audio.asnds. Beginning with PC speaker sounds, additional sounds must appear after the last PC speaker sound. Then existing AdLib sound entries must be shifted up the numbered list by the number of PC speaker sounds added, followed by additional entries corresponding to the number of new AdLib sounds. The number of of PC spaker sounds and Adlib sounds must equal each other. Lastly, music is shifted up the numbered list by the required amount. The result is a consistent numbered list of pc speaker sounds, AdLib sounds, and music files.
This process requires a lot of relabeling files, detailed modification to audio.asnds, importing with Abiathar, and modification to and recompiling the source code. With that in mind, it is highly recommended to import all additional sound effects at one time (using placeholders if necessary), to avoid repeatedly having to reorder files and filenames. Adding new music is a similar process, but because the music cluster of chunks appears last in AUDIOT.CKS, it is a simpler task requiring less forethought.
Adding Sound Effects
Begin the process by naming your PC speaker sound effects so that they occur after the final existing PC speaker sound in your AUDIO folder.
Next, all AdLib sounds must be renamed so that their numbered order begins after the new final PC speaker sound. Automating this process?
Next, your new AdLib sounds should be renamed to occur after the newly ordered final existing AdLib sound.
Next, all music files must be renamed so that their numbered order begins after the new final AdLib sound.
Next, audio.asnds will need to be modified in the same manner that the files were renamed: PC speaker sound entries added, Adlib entries renumbered, Adlib entries added, and music entries renumbered.
Next, import the new files using Abiathar's import process.
AUDIOCKS.H must be updated to reflect the new sound effect and musical totals. In AUDIOCKS.H you will update: NUMSOUNDS to the total number of PC speaker (or AdLib, but not both) sounds, and NUMSNDCHUNKS to two times the value of NUMSOUNDS (reflecting both PC speaker and AdLib sounds) plus the value of NUMMUSIC.
For example, if NUMSOUNDS = 70 and NUMMUSIC = 5, then NUMSNDCHUNKS = 145.
Lastly, recompile the code.
Adding Music
Begin by naming your songs so that they occur after the final existing music files in your AUDIO folder.
Next, audio.asnds will need to be modified with music entries added for the new songs.
Next, import the new files using Abiathar's import process.
AUDIOCKS.H must be updated to reflect the new sound effect and musical totals. In AUDIOCKS.H you will update: NUMSOUNDS to the total number of PC speaker (or AdLib, but not both) sounds, NUMMUSIC to the number of songs, and NUMSNDCHUNKS to two times the value of NUMSOUNDS (reflecting both PC speaker and AdLib sounds) plus the value of NUMMUSIC.
For example, if NUMSOUNDS = 70 and NUMMUSIC = 5, then NUMSNDCHUNKS = 145.
Lastly, recompile the code.
Source Code Editing
Because source code modding provides endless possibilities, only limited by a modder's programming ability, this section will only introduce the most basic steps involved in some fundamental modifications that a modder might want when creating a 'typical' Commander Keen mod.
How to modify a creature's behavior
How to create a new enemy actor
How to create a new tile property
Compiling the Source Code
Introduction into Borland C++ v.3.1
