Keen Galaxy Modding Tutorial (patch based)
This tutorial aims to teach patch based Keen Galaxy modding (Keen episodes 4, 5, and 6) to people who don't know the first thing about modding, however even the experienced modder should find this information to be a good reference tool. Keen 4 will be used for specific examples, but it should be easy to follow along with episode 5 or 6 as well.
This tutorial is written as a primer for Keen Galaxy source based modding, which is a more advanced form of modding that uses source code instead of patching. Many of the processes, tools, and concepts from this tutorial will carry over.
- Note: This tutorial was written with Windows users in mind. Linux and MacOS users might need to install WINE in order to run a couple of Microsoft Windows based tools and script/batch files.
Setup
Download the Keen Galaxy Modding Package. This package is set up to provide a folder structure ideal for learning modding using Keen 4 and also includes a folder of modding tools, a folder for patches, and a folder providing a wealth of modding knowledge collected from members of the Keen community. Make sure to extract all files and keep the pre-defined folder structure.
- Note: Alternative to using the modding package, you can create your own. Create a base folder called "KeenModding" on your desktop. In this folder create two subfolders: "Keen4mod" and "Tools". In your "Keen4mod" folder, create a folder called "EGA" and a folder called "AUDIO". Copy all Keen 4 game files into the folder "Keen4mod". Download all tools to the "Tools" folder.
- Note: It is important that you use the right version of the episode you wish to mod: Keen 4 v1.4, Keen 5 v1.4, and Keen 6 v1.4.
Tools
The following table lists the tools needed to follow this tutorial. All tools, except graphical editing software, are included in the modding package mentioned above.
| Tool Name | Usage Description | Additional Note | |
|---|---|---|---|
| Abiathar | Level & Tile Property Editor, Sound & Music Import/Export | ||
| CKPatch | Patching the game executable | ||
| DOSBox | Emulator for MS-DOS Environments | ||
| KeenScr | Intro/Outro DOS screen Graphic Text Editor | ||
| IMF Creator | Converting MIDI music files to IMF | Be advised that several antivirus programs have flagged this program as malicious. | |
| IMFCrush | Optimizing IMF music files | ||
| IMF Player | Playing IMF music files | While not directly useful for modding, it can be used to see how an IMF song sounds. | |
| MIDI2IMF | Converting MIDI music files to IMF | ||
| MS Paint or GIMP or PhotoShop or Krita | Drawing Tools | One of the simplest tools for modifying Keen graphics is MS Paint. However, only the versions of MS Paint prior to Windows 7 will function with the Keen palette correctly. Tutorials for setting up older versions of MS Paint on later versions of Windows can be found online. | |
| The Neural Stunner | Used for easy patching | ||
| uGrab | Graphics Import/Export | ||
| UNLZEXE | Unpacks the game executable | Get the 32/64 bit version. | |
| WDC | Sound Effect Editor | This tool was designed as a modding suite, however only the sound editor will be used. |
- Note: There are several older modding tools that are no longer supported by this tutorial and are not included in the modding package. They can be found on the Galaxy Tools page.
CKPatch & Unlzexe Setup
Copy the following files into your "Keen4mod" folder from your "Tools" folder:
- unlzexe.exe
- ck4patch.exe (Keen 5 requires 'ck5patch.exe', Keen 6 'ck6patch.exe')
Once these files are in place, unlzexe your Keen4e.exe by dragging and dropping the file onto unlzexe.exe. A window may flash on the screen when you do so.
- Note: If you are using the 32/64 bit version of unlzexe, this will create a Keen4e.exenew. You will then need to delete or rename the old Keen4e.exe, and then rename Keen4e.exenew to Keen4e.exe.
- Note: If you are using the 16 bit version of UNLZEXE, open a command line in that folder and enter
UNLZEXE KEEN4E.EXEto unpack it. - Note: Keen 5's executable is Keen5e.exe, Keen 6's Keen6.exe. Keen 6's executable does not have an e after the episode number, unlike the other two episodes.
This is a one time process; once your executable has been unlzexed, you can delete unlzexe.exe.
EGA Folder Setup
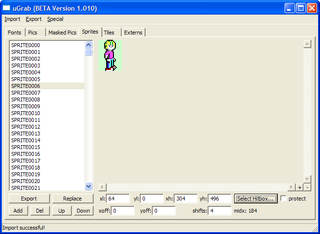
From your "uGrab" folder in "Tools" copy/paste uGrab.exe into your "Keen4mod" folder.
Also from your "uGrab" folder, look in both sub-folders. From the "def" sub-folder copy/paste keen4_ega_apogee_14.def into your "Keen4mod" folder. From the "batch" sub-folder copy/paste ugrab_k4_out.bat and ugrab_k4_in.bat into your "Keen4mod" folder as well.
Back in your "Keen4mod" folder execute ugrab_k4_out.bat first, followed by ugrab_k4_in.bat. You can do that via double-clicking both batch files. This will extract all necessary files stored within the EGAGRAPH file.
You can now find all graphic and text files in the "EGA" folder of your mod directory.
- Note: If desired, uGrab can also be run manually instead of using batch files. To do this, run the uGrab.exe executable and follow the instructions in the menu dialog.
Editing Graphics and Text
To begin editing the graphics and most text found in the game, go to your "EGA" folder. You'll see a lot of images there as well as some text files and some other files.
Graphics
You can edit any of these images however you want, but keep some things in mind:
- You need to use the original Keen color palette. This is easy to do if you just edit the images with MSpaint.
- Note: Windows 7/10 users will need to download the old version of mspaint.
- You'll notice a light green color that is not part of the 16-color palette in some images. This color is used for transparency; it fills in the space that is not displayed in-game.
- The image that displays in the scrolling story (for Keen 4 this is 4bmp0102.bmp) is limited in palette colors. The colors available can be changed with patching.
- On sprites, you'll notice a red box on a grey background on the right side of the image. This is used for hitbox measurement, although it doesn't directly affect hitbox size (the ck4_sprites.txt determines this, see the hitboxes section below).
- The height and width of images must be multiples of 8 (although some of the original images do not follow this rule).
- Changing the size of an enemy will affect how it spawns (it could get stuck in the ground) and the 'hitbox' area it uses to interact with the environment and with Keen.
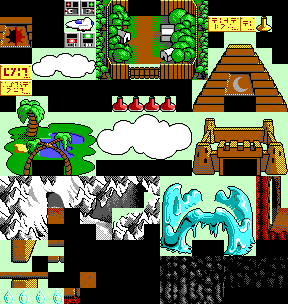
- Tiles are made up of a 16 by 16 area of pixels.
- You cannot change the size of the tilesets.
- Note: Although uGrab supports adding additional graphics, this feature is only usable when modding the source code, which is not done here.
Hitboxes
In Keen Galaxy, hitboxes are invisible rectangular areas used for telling a sprite how to interact with the environment and with Keen. For a point item, the hitbox is the area keen must touch to collect the item. For an enemy, it is the area of the enemy that will touch the ground and touch keen. For Keen himself, its the area he can interact with platforms, enemies, and other objects.
To edit the hitboxes, open ck4_sprites.txt.
We'll use Keen's left facing standing frame as an example. The image name for this is 4spr0006.bmp. So in 4sprites.txt, look for item 6. It will look like this:
6: [4, 0, 19, 31], [0, 0], 4.
The first set of brackets controls the hitbox. The first set of numbers are x and y coordinates for the top left corner of the hitbox. These are measured from the top left of the image (4 pixels across and 0 down). The next coordinates are for the bottom right of the hitbox. These are also measured from the top left corner of the image (19 pixels across and 31 down). Notice that even though the image is actually 32 pixels high, the hitbox is designed to be 1 pixel away from the bottom. This is important for any sprite that needs to move on a platform.
The second set of brackets are coordinates that have to do with where a sprite image appears in-game relative to where it is placed in the level editor. In the example of the Keen sprite, these are 0,0. Its usually easiest to leave these at 0,0, but if you use a sprite that changes frame size over the course of its animation, or a sprite intended to float above the ground, you may want to experiment with this. The first value is an X coordinate and will determine how far to the right or left the sprite is placed (negative values spawn that many pixels left, positive values that many pixels right). The second value is a Y coordinate which determines how far up or down the sprite is placed (negative values spawn further up, positive values spawn further down).
- Note: If you've modded an enemy and it is stuck in the ground or in the air, you'll want to edit the Y value to bring the hitbox even with the ground.
The last value is not a coordinate but has to do with animation frame rate. In the example of Keen, this value is 4. This value can be either 1, 2, or 4. This determines how 'smooth' the frames in a series animate, 4 being the smoothest, 2 medium, and 1 low. The smoother the animation, the more memory will be used in the level.
- Note: Use the 4 value sparingly to avoid memory issues and game crashes.
Texts
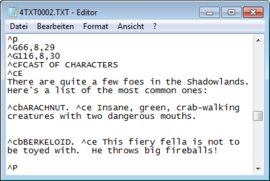
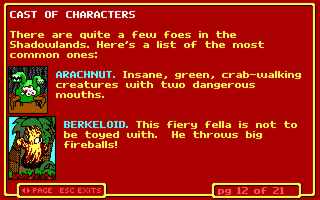
The "EGA" folder contains a number of text files. You can edit these with notepad or a similar application. These files include the help sections, the story, and the end-game story.
These files employ a formatting code:
^PMarks the beginning of a page.
^Gy,x,nDisplays a bitmap image where n is the image number and x,y form the pixel coordinates of where the image will be placed. The image number is offset by 6 in relation to the image names in your "EGA" folder; to get the correct number, take the image number from the image's filename and subtract 6. So, for example, if you want to display image 22 at coordinates 10,10, it would look like^G10,10,16.
^Ly,xText following this code will be aligned from pixel location x,y.
^CcChanges the text to color c, which is a single hex digit, 0-9 or A-F. The specific codes for changing the color of text are:^CAlime text color^C2green text color^CBcyan text color^C3dark turquoise text color^CCred text color^C4red text color^CDmagenta text color^C5violet red text color^CEyellow text color^C6brown text color^C9light blue text color^C1blue text color^CFwhite text color^C7light grey text color^C8grey text color^C0black text color
^Ty,x,n,tAfter a delay of t time units (t/100 seconds?), this timestamp displays a bitmap (n - 6) at pixel location x,y on the screen.
^By,x,w,h,cFills a width-by-height pixel rectangle at pixel location x,y with color 4 (dark red). The c parameter is ignored in version 1.4.
^EMarks the end of the text file.
Importing Graphics and Texts
To import graphics into the game, simply double-click ugrab_k4_in.bat.
Your graphics and text files have now been imported into the game files, however, in order for them to appear in-game, patching must be done according to the steps in the next section.
Patching
A patch file is used as a library of instructions for the game to use modified content. It's what allows you to utilize new graphics, new tile properties, new levels, new music, new text, new enemy behaviors, etc. It also allows you to change the 'rules' of the game in certain ways (although there are many limitations).
Patching Setup
To create a patch file, create a new text file called patchfile. Open the file and insert the following code lines:
%ext ck4
%version 1.4

# Load the modified graphics
%egahead EGAHEAD.CK4
%egadict EGADICT.CK4

%end
Finally save it as patchfile.pat, making sure to select all files in the Save as type section.
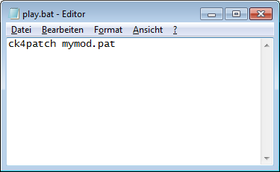
A batch file is what you'll use from now on to run your mod. To create a batch file, first create a new text document and name it whatever you want. In this example we'll use Play. In the text file, type:
ck4patch patchfile.pat
Now, go to file and save as Play.bat, making sure to select all files in the Save as type section.
Run Play.bat in DOSBox to make sure your mod is working. If you see your modified graphics and/or texts, it works!
Patching Basics
After you've made sure Play.bat runs fine, open up patchfile.pat with a text editor.
You should see:
%ext ck4
%version 1.4

# Load the modified graphics
%egahead EGAHEAD.CK4
%egadict EGADICT.CK4

%end
Here's what each line means:
- The first two lines mark the beginning of your patch file.
- The # symbol indicates a comment. Any line preceded by a # will be skipped over and allows you to include notes in your patch file.
- %egahead EGAHEAD.CK4 and %egadict EGADICT.CK4 tell the game to use your new graphics.
- %end will mark the end of your patch file. Anything that appears after this will not be read by the game, so make sure that any patches you add to this file are included before this line.
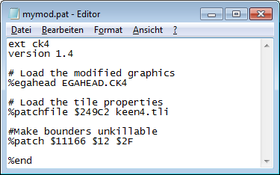
Here's an example patch that makes it so the Bounder can't be stunned:
%patch $11166 $12 $2F
Now add it to the patch file and also add a comment explaining what it does.
%ext ck4
%version 1.4

# Load the modified graphics
%egahead EGAHEAD.CK4
%egadict EGADICT.CK4

#Make Bounders un-stunnable
%patch $11166 $12 $2F

%end
Now save your patch file and run Play.bat . Bounders can't be stunned!
For a deeper understanding of how patches work please check out Levellass' Keen Patching Tutorial, which is a basic step-by-step guide from simple to complex patch techniques for the novice patcher.
Patching Essentials
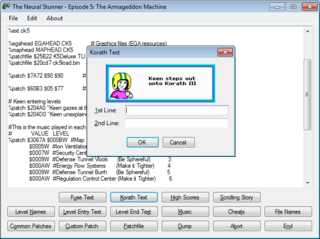
To generate some of the most common patches for your mod (for things such as level names, the scrolling story, and more), use the tool The Neural Stunner, which can be found in your "Tools" folder. It will generate patches based on your input which you can copy to your patch file.
K1n9_Duk3 has written a patch script that fixes some graphical glitches in Keen Galaxy that are caused by playing in DOSBox. It is highly recommended to include this patch in your patch file. You can also find this script in the "Patches" folder of the Keen Galaxy Modding Package.
You can find all kinds of patches on the Patches Wiki page or on the Keen Modding Forum (you can make specific requests there too!). Lastly, don't be afraid to dig through the patch files of existing mods, many have unique patches you might be unable to find elsewhere.
Level Editing
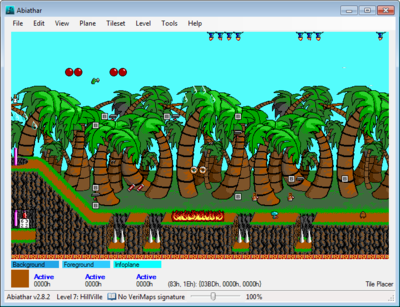
Abiathar is the most up to date and feature rich level editor for Keen Galaxy. It comes with a Documentation/Help file which is strongly recommended. It contains advanced information this tutorial cannot match. Fleexy, the author, has uploaded a video tutorial where most of the basic features are examined.
Setting up Abiathar
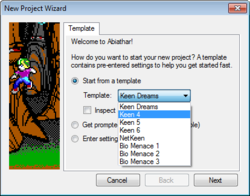
To get started open Abiathar and go to File, New, and a Project Wizard will appear. This wizard will help walk you through the creation of your project dependency file.
1. Select Start from template and the episode from the drop-down list.
2. Select your Keen4mod folder as the containing folder.
3. In the next window, I recommend selecting Load level files from the original game (viewing and editing existing levels is one of the easiest ways to learn how levels are designed).
4. In the next window for level files, leave these as the defaults (GAMEMAPS.CK4 and MAPHEAD.CK4).
5. Next, for the graphics source, select Tile sheet bitmaps. This will bring up a graphics files window: for unmasked, browse and select your background tileset from your "EGA" folder (ck4_tile16.bmp). For the masked, select the foreground tileset (ck4_tile16m.bmp).
6. Next, for the tileinfo source, select Create or load a separate tileinfo file. The next window will give you some options for the tileinfo file: leave these on the default settings (Include the original game's tileinfo).
7. Select Finish.
Before proceeding, make sure to go to File and Save to save your newly created Abiathar project file (.adeps file). From this point forward, whenever you open Abiathar, you'll also want to open this project file.
Update Patchfile
In order to load your modified levels in the game you'll need to add the following patch to your patchfile:
# Map files
%maphead MAPHEAD.CK4
Using Abiathar
In Abiathar one can move throughout the level with the help of the keyboard and the scroll wheel.
| Keyboard | Arrow keys move the viewer 1 tile Holding Control changes the offset to 5 Holding Shift multiplies the offset by 3 Pressing Backspace moves back to the upper left
|
| Scroll wheel | Each notch of the wheel moves 2 tiles vertically Holding Control makes it move horizontally
|
| Zoom | The zoom controls can be found under the View menu or by using the + and – numpad keys.
|
Tile Palette
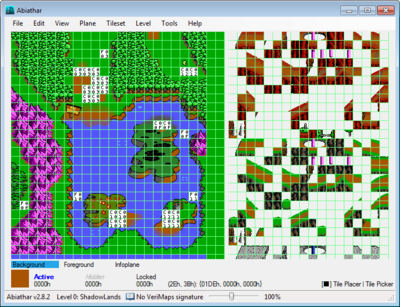
The tile palette can be called either with the Tileset menu or by pressing Space to change to the tile palette view. To change between the palette views, press appropriate number key: 1 calls the background set, 2 calls the foreground set, 3 calls the set of infoplane pseudo-tiles.
Simply click a tile to select it for placement (the active selected tile is shown in the bottom left). When finished, press Space to return to your level. If you do not want to press Space to access the palettes, you may at any time press:
7 to open the background palette, 8 for the foreground, or 9 for the infoplane.
Alternatively and highly recommended is the Simultaneous option found in the Tileset menu. This allows you to have both the level and tileset in view at the same time.
Plane States
Keen 4, 5, and 6 levels consist of three planes, also called layers: the background, foreground, and info layers. The background is just there to add color to the scene; Keen and the enemies don't interact with it. The foreground layer contains tiles that Keen interacts with: platforms, point items, doors, secret passages, and so on (note that many tiles in the foreground layer actually appear behind Keen, but they are not considered 'background tiles'). Finally, the info layer contains information about sprites and special features such as switches, doors, bridges and so on.
Editing with all panes active at once is not recommended. To help you see and change only what you want to, Abiathar has several systems to control the status of the layers. Each of the three panes in the lower left can have one of three states:
Active
|
visible and editable (default) |
Locked
|
only visible |
Hidden
|
not visible or editable |
These can be controlled in several ways. The Plane menu provides fine-adjustment tools and commands to modify the state of multiple or all the planes/layers at once. While viewing a level, the 1-3 keys control editability for the respective plane, while the 4-6 keys control visibility. For example, the 2 key toggles the foreground plane between Active and Locked, while the 4 key toggles it between Active and Hidden. The labels in the selected tile bay that display the plane states can also change them. Right-click one to make it less active (active will become locked, locked will become hidden) or left-click to make it more active (hidden will become locked, locked will become active).
One simple way of managing plane control is to select Lone Editing in Plane. This ensures you are always editing a single plane.
Undo & Redo
Undo and Redo can be found under the Edit menu or by pressing Z. The undo/redo action stack is preserved until the file is saved or closed.
Level Operations
Level operations can be accessed from the Level menu, above the levels list. Adding a level is done with Level → Add. If one changes the suggested ID to one that is in-use, a warning will pop up before overwriting. The Automatic edge check box will cause Abiathar to automatically fill in the boundary.
Even after a level is created, its dimensions can be changed or an automatic border can be added using the using the Level → Properties dialog. It is also possible to duplicate levels into a new slot with Level → Copy.
Overlays
All overlays can be found under the View menu section.
Grid
|
separating the tiles (it is automatically adjusted for changes in zoom level) |
Links
|
overlay processes unknown infoplane values and renders graphical links instead of infoplane |
Tile Properties
|
displays foreground tile properties even in the selected tile bay and tile palette |
Level Features
Borders
Keen Galaxy levels have a rectangular border of 2 tiles. Borders should be filled with solid tiles with some exceptions. To create a level exit, leave the border empty where you want Keen to exit. Keen cannot exit out the top or bottom of the screen (Keen will die on the screen bottom and Keen will glitch on the screen top).
Doors
To place doors that Keen can enter, first place two sets of door tiles on the map.
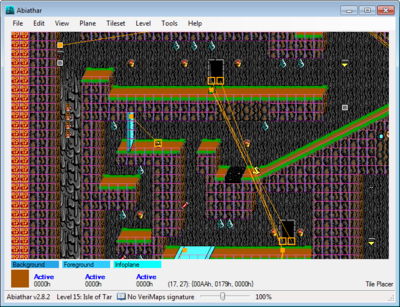
Then press L and K on your keyboard. This activates the linker tool. Make also sure that only the Infoplane is active. Next click on the bottom tile of the first door and after that click on one tile below the second door. Repeat this step vice versa. Abiathar will render the links as lines from the controller to the target. I suggest examining some of the original levels to get an idea how this is done.
Key Gem Doors
To place a keygem holder, first place the foreground keygem holder tile somewhere on the map (it can be anywhere). Next place a door (these are also foreground tiles) somewhere (anywhere). When making the door, there are three door tiles: a bottom, middle, and top. If you're making a door more than three tiles high, use the middle door piece for additional height.
Then press L and K on your keyboard. This activates the linker tool. Make also sure that only the Infoplane is active. Next click on the keygem holder tile first and second on the topmost door tile. Abiathar will render the links as lines from the controller to the target.
Invisible Foreground Tiles
Even if a foreground tile doesn't contain any graphics (a blank tile) it can still be placed in a level and can still contain tile properties.
An example of this is how the default world map is built primarily from background tiles which do no have solid properties and 'invisible' foreground tiles are placed to block Keen's path.
Another example is how a bridge in the open position requires invisible bridge tiles to be placed where the bridge will appear when a switch is triggered.
These can be difficult to figure out. A good way to familiarize yourself with these is to view the world map with the tile properties view turned on to see how these are utilized. You can right click a tile in the map to see where it is located in the tileset, and then, if desired, you can edit the invisible tiles in your graphics editor to have visual cues for placement (they can be made invisible again later). Alternatively, you can use foreground tiles to build the world map in your mod (although this will use more memory).
Moving Platforms
A simple moving platform in Keen 4 can be placed by putting a moving platform sprite icon with a red arrow in the desired spot. To stop the platform moving off the edge of the screen however, you'll need to put some blocking tiles in its path: these icons look like a B in a square. Put one blocking tile to each side (for a horizontally-moving platform) or above and below (for a vertically-moving platform). A falling platform (the one with a yellow triangle below) only needs a single blocking tile beneath it. In Keen 5 and Keen 6, the platforms with green arrows (known as Goplats) need a path made of the yellow arrow icons to follow.
Scroll Blocks
Some Keen levels have separate areas that act like independent mini-levels (the Pyramid of the Forbidden is a good example of this). You can place scroll blocks from the sprite menu to mark horizontal and vertical edges between these areas. The scroll blocks look like horizontal and vertical blue lines with small white stripes; I suggest examining existing levels to see how they are used before placing them in your own levels.
Secret Passages
Some foreground tiles have properties that allow Keen to walk behind them; these are secret passages. To make these you will need to identify which tiles have the correct foreground but not blocking properties. I suggest examining some of the original levels and noting down which tiles are used for the secret passages. You can also identify them with the Tile Property Modifier tool in the Tool menu. When putting point items in a secret passage, you must use points from the sprite list rather than the foreground tile points.
Sprites and Enemies
You can place sprites like you would normally place a tile. Some enemies appear more than once in the sprite menu; this is for enemies that appear on easy, moderate, and hard. You can see little numbers that designate this, but a general rule is that the order they appear in on the menu matches the easy/medium/harder order. Sometimes there is a blank space before or after the order of sprites. For example, the blue bird from keen 4 doesn't have a sprite icon for easy mode, however, it does have a blank tile where the easy mode icon would normally go. This blank tile can be placed to place a blue bird on easy. This works similarly for other enemies in this situation.
Switches for Bridges
To create a switch for bridges, first build the bridge using the bridge tiles and place the switch tiles somewhere (near). Then press L and K on your keyboard. This activates the linker tool. Make also sure that only the Infoplane is active. Next click on the switch tile first and second on the top left most bridge tile. Abiathar will render the links as lines from the controller to the target.
If you want the bridge to begin already opened, you will need to locate the invisible bridge tiles and place these where the bridge will be located, otherwise no bridge will appear. To find these either locate them in existing levels with open bridges or use the Tile Property Modifier tool in the Tool menu.
Switches for Goplats
Often you want the player to have to turn a platform on with a switch. To do this you will need to place another blocking tile in the way of the platform between the other two. After placing the blocking tile, press L and K on your keyboard. This activates the linker tool. Make also sure that only the Infoplane is active. Next click on the switch tile first and second on the blocking tile. Abiathar will render the links as lines from the controller to the target.
General Level Editing Issues
Each level must not exceed 64KiB in size: width x height (in tiles) must not exceed 0x8000 (=32,768). Rule of thumb: As long as both stay below 180, there‘s nothing to worry about. The max level height is 250 tiles, and the max width should not exceed 256 tiles.
If there are too many sprites in a level you will get the error No space left in objarray; the game has run out of memory to store sprites. This usually occurs at the level start. To fix this, remove sprites from your level. When placing sprites, keep in mind that the more variety of enemies you use, the more memory is used up, and the larger the sprite and the more frames it has, the more memory it uses. Also, when trying to save memory, check your points items: these exist both as tiles and sprites (try to use tile points whenever possible).
If you have too many different types of tiles (background and foreground) then you will get the error No space left in tilearray; this means that the game does not have enough memory to store all the different tile types. Foreground tiles use 8x the memory of background tiles. You shouldn't have more than about 400 tile types total (background and foreground) in a level, usually 100 back and 300 fore. Additionally, animating tiles with many frames can increase your tile count drastically.
You cannot have more than 20 actively animating tiles on-screen at any one time, this includes item tiles. This will cause an animating tile error. (Not enough memory to animate all these tiles.)
If a level is 'too large' for its music file, the error Not enough memory to play background music! will occur. This is an indication of either large levels or large music files. To fix this error, remove content from your level, and/or reduce the overall level size, and/or change the music to a smaller sized file.
If you see static gibberish instead of an animation while testing your level, then you have placed an animating background over an animating foreground. For memory reasons this is not allowed. Similarly, a sprite cannot be placed on top of an animating tile. This will crash the game.
- Note: All of these problems and more can be detected by Abiathar when using it's Level Inspector tool or the inspection mode (press 'I') of the Tile Property Modifier. It also provides exact points in the level where errors and possible issues appear so that you do not have to launch the game repeatedly to fix bugs.
Tile Properties
Abiathar comes with a built in tile properties tool used to modify tile properties. To access it in Abiathar, simply go to Tools and then Tile Property Modifier. This will bring up a tiny window used in the modification process.
Changing Tile Properties
The tile property modifier window will display the properties of the currently selected tile. The controls can be used to modify the tile property. Each time you select a new tile, the previously selected tile's properties will be saved. When you're finished simply close the tile property modifier.
- The
Revertbutton is used to return a tile's properties to what they were when that tile was first selected.
- The
Frontcheck box on the left indicates whether the tile will appear in front of characters such as Keen.
- The
solidcheck boxes on the left and right determine whether the tile is solid on the respective side.
- From top to bottom, the drop-down menus determine: top property (e.g. flat, slope), special effect (e.g. deadly, point item), and bottom (similar to top but affects the bottom face).
- The Animation section determines the offset to the next tile in the animation sequence and how many game-ticks will elapse before changing to it. A delay of zero is used for switches and things that are only controlled by sprites. Tiles that do not animate have an offset of zero.
One major useful shortcut is the copy and paste feature. Use the C key to copy the active tile’s properties and enter copy mode. While in copy mode, any tile you left click will be given the properties of the copied tile. Press the X key to exit copy mode.
The tile property modifier has other features which you can read about in Abiathar's Documentation/Help file.
Update Patch File
After editing tile properties, don't forget to add an entry to your patch file to actually use these new properties:
# Tileinfo file
%patchfile $249C2 KEEN4.TLI
Music and Sounds
Abiathar is used for importing and exporting music and sound effects, as well as adding additional music tracks.
Setup
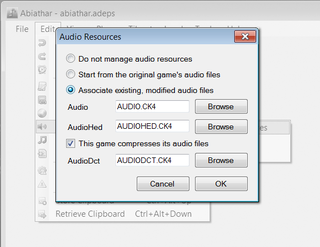
In Abiathar and with your project loaded, go to Edit, then Audio, then Resources. Select Start from the original game's audio files. Abiathar should then populate the boxes with the game's associated audio files. Select OK.
Then go to Edit, then Audio, then Export. Select Yes and then browse to your mod's AUDIO folder. Give your Abiathar sound configuration file a name such as audio.asnds and save. Abiathar should inform you of an successful export and all of the games music and sounds can now be found in your AUDIO folder.
To change music and sounds, just replace the files in AUDIO with new files (they must be the same format). Music files are in the IMF format and we'll get into how to make these below. Sound effects can be created and modified using WDC, which we'll get into below as well.
After changing the sounds or songs, go back to Abiathar and, with your project open, go to Edit, then Audio, then Import. Select your audio.asnds file. Abiathar should inform your that an import was successful.
Update Patch File
In order to play your new sounds you'll need the following patches included in your patch file:
# Audio files
%patchfile $20DF0 AUDIOHED.CK4
%patchfile $354F6 AUDIODCT.CK4
Music
You can compose music using your choice of software; as long as it outputs standard General MIDI files, you should be good to go. Some tools used by musicians in the community include Finale, FLStudio, and MIDI Editor.
Be advised, however, that your MIDI will need to be converted to the IMF format, which is extremely limited in range compared to MIDI. Both IMFCreator and MIDI2IMF can be used for converting music, and both are suggested since they can produce different sounding results. It's a good idea to read and get an understanding of the IMF specs.
Lastly, your IMF song will need optimizing with IMFCrush for memory purposes (this process does not typically result in any noticeable loss in sound quality).
Composition Tips
- If you are using a sheet-music editor such as Finale: You may write two or more parts for one instrument. Keep inside the required 4-note polyphony, but don't be shy about using layered parts and chords, especially on piano staves.
- If your instrument track is too quiet and it is already set to maximum volume, try manually adjusting the note velocities to be higher. The program FLStudio is capable of doing this, as well as MIDI Editor. If the volume of the track is too loud after making your note velocities higher, turn down the volume of that track.
- Keep percussion parts as simple as possible since it impedes the maximum polyphony limits that can be utilized by other parts. Simply put, you can write more complex parts that use this structure: [SIMPLE/NO PERCUSSION]+[BASS LINE]+[CHORDS]+[CHORDS?]+[LEAD]
- A tip from Bobby Prince: On the subject of percussion, to circumvent the polyphony limit that gets imposed when you use percussion parts, try using normal instruments played outside their normal range. Then in IMFCreator, tweak the patches you used by adjusting all the possible parameters until you archive the desired percussive sound. It may not work all the time, but it should do the trick in most cases.
- Don't be shy about using chords and complex structures, especially if your percussion line is nonexistent or very simple.
- Try not to use too many midi tracks, especially if they are all simultaneous. Too many midi tracks results in dropped notes (parts drop out randomly and inconsistently), and songs that exceed the filesize limits. Mr. M uses 4-8 tracks, counting percussion, to archive the sound in his work.
- Be careful with pitchbends in your music. IMFCreator tends to over exaggerate them if the pitchbend scale and thresholds are not set properly. There is no ONE configuration for them; best bet is to tinker with them until you get a desirable sound. Remember: Lower numbers mean higher pitchbend scale!
Instrument Patches
Don't be afraid to tweak patches! In IMFCreator it's under the EDIT, Instrument (or press CTRL+I) menu. You can edit how all the instruments sound (including percussions). Distortion guitar not distorted enough? No problem. Pad not airy enough for you? Bass drum not punchy enough, or the hi-hat not sharp enough for you? No problems there. See the help menus for the specifics of how the patch parameters are edited.
When Mr. M does this, he makes a patch set for each specific song. When you close the instrument editor, you are prompted to save changes. Do so, and save the .OP2 file that is generated as something other than GENMIDI.OP2. Keep the original GENMIDI.OP2 file as a base set.
After you've tweaked the patches to your liking and saved your new .OP2 file, stop any playback of the song you're previewing. Under OPTIONS and OP2 File you can choose the OP2 file that has the modded patches you created. Press play and listen to your new instruments!
- Note: After editing an .OP2 file/patch set, you MUST stop and re-start playback in IMF Creator of your song for the changes to take effect.
Converting to IMF
MIDI2IMF
Use MIDI2IMF to convert a MIDI track to the IMF format. To do this simply drag and drop your MIDI file onto mid2imf.exe and it will output a converted IMF version of the file.
You can also create a batch file to include the various conversion options that MIDI2IMF is capable of using. These options are beyond the scope of this tutorial and can be found within the program's readme.
IMFCreator
IMFCreator is another program for converting MIDI songs to IMF. It also allows you to preview how the song will sound in the IMF format.
To convert a MIDI, simply load it into IMFCreator and click Convert to IMF.
IMF Optimization
Use IMFCrush to optimize your IMF track's size for memory usage purposes in-game. To run, you will need to create and run (not in DOSBox) a batch file with the following:
imfcrush.exe <the original imf file name> <the optimized imf file name>
An example of this might look like:
imfcrush.exe song.imf optimized_song.imf
IMFCrush, allows for options in the optimization process, however these are beyond the scope of this tutorial. The options can be found in the program's readme.
IMF Playback
IMF Player can be used to listen to your IMF song tracks. To use this program, you'll want to copy your IMF formatted songs in the same folder as imfplay.exe. Then drag and drop imfplay.exe onto DOSBox to get it started. In the DOSBox command line, type:
imfplay.exe <your song>.imf 560
- Note: 560 is the rate used by Keen Galaxy songs.
Importing Music
After you've created a song, converted to IMF, and optimized it with IMFCrush, you'll want to swap it into your mod. To do so you'll first need to locate an original music file you want to replace in the "AUDIO" folder of your "Keen4mod" folder. For Keen 4, these range from sound156.IMF to sound161.IMF. Then, simply rename your song to the same file and copy over the original.
Once your new song is in place, open Abiathar and, with your project open, go to Edit, then Audio, then Import. Select your audio.asnds file. Abiathar should inform your that an import was successful.
Sound Effects
WDC is used for PC speaker and Adlib sound composition.
WDC Setup
Begin by installing WDC to your tools folder. Once this is complete, go to the WDC folder and create three new folders inside: "Keen4input", "Keen4output", and "KeenSounds". You should then copy a clean version of Keen 4 into the "Keen4input" folder, specifically the files: Audio.ck4, Egagraph.ck4, Gamemaps.ck4, and Keen4e.exe.
- Note: Make sure this version of the keen4e.exe has NOT been unlzexed.
Now run WDC.exe. After it loads, go to File then New Project. WDC will then ask you to name the project and save the project file; name it keen4project and save it to you WDC folder.
WDC will then bring up a window with several options. Under Base Data Folder select your folder "keen4input". You will then get a no map code file alert. When this occurs, select User Other and then select blank.wmc. Under Output Folder select your folder "keen4output". On the left side you will see a small menu, select Other Options and then check the box for Use Tile16s for maps, if they exist. Press OK to save your project settings.
Using WDC
You should now see the Keen 4 world map. Go to View and select either PC Sounds or Adlib Sounds. Adlib sounds are recommended as a starting point, since they are what most players will use and hear.
WDC will then load the list of sounds for that category. You can sample each sound by clicking it. Playback controls are located in the upper right. To edit a sound, click the small hammer icon in the lower right. WDC will then ask you where you want to save the file. Navigate to your "keensounds" folder. Name the sound in such a way that you can remember what it is: "slugslime", "jump", "item" etc.
WDC will then load it's sound editor, which is different for different sound formats (PC speaker vs Adlib).
Adlib Sounds
For Adlib sounds, there are various tabs for effecting how the sound is played, and the main area allows you to use your mouse to 'draw' the sound. Sound editing is a complex task and the only real advice I can offer is to just play around in the editor and save sounds that you find good or interesting. Modifying the octave and waveform of a sound in particular can have some interesting effects.
- Note: The priority of a sound tells the game which sound has priority to play since only one sound can be played at a time. Values can be from 00 to 99 with the higher numbers being higher priority.
PC Speaker Sounds
For PC speaker sounds, the editor has one main area to 'draw' the sound. From Edit you can move the drawn sound 'up' or 'down' which changes the pitch of the sound.
- Note: A quick trick for creating PC speaker sounds that match your created Adlib sounds is to go to
Fileand thenImport Adlib to PC Sound. This will convert an existing Adlib sound to PC speaker sound (although you may still want to tweak the sound after conversion).
Importing Sounds
After you've saved some sounds with WDC, you'll want to swap these into your mod. To do so you'll first need to locate the original sound file you want to replace in the "AUDIO" folder of your "Keen4mod" folder. You can do this by finding the number of the sound you want to replace in WDC and then locating the corresponding number in the "AUDIO" folder.
When you've located the original sound you want to swap out, copy it's name to your new sound and then replace the file. Then, open Abiathar and, with your project open, go to Edit, then Audio, then Import. Select your audio.asnds file. Abiathar should inform your that an import was successful.
Loading Window
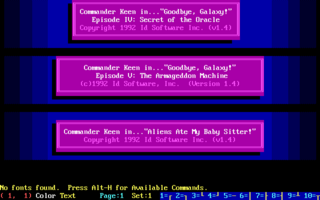
The DOS loading and closing windows are modified with KeenScr and TheDraw.
To begin, go to your "EGA" folder and look for the file ck4_ansi_endgame.bin. Copy this to your "keenscr" folder in "Tools" and then rename it to 4msc0000.bin.
Load KEENSCR.EXE into DOSBox and then type either:
keenscr 4
or
keenscr load
TheDraw will then start with either the DOS exit screen or the loading graphic loaded.
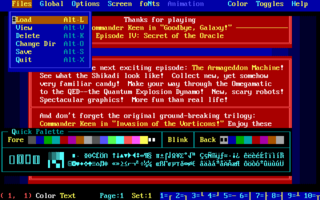
Using TheDraw
Use Alt+H to display the help screen with all the commands that TheDraw supports; however, its basic use is extremely simple. Use the arrow keys or mouse to select where you want to enter text, then type it in. By default, it uses bright white color over black color; you can copy a color straight from the screen by placing the cursor over any character and pressing Alt+U, and it will use that color as you type.
You can use Alt+M to enter drawing mode, where you can use the cursor keys or the mouse to draw on the screen; you should enable Draw mode with the cursor in the place where you want to start drawing, as it will start immediately. Alt+F1 to Alt+F4 will give you different line styles for Draw mode.
Saving
Once you are done editing the screen, you can save it by pressing Alt+S. TheDraw will ask which format to save it in; press B to select Binary, and enter the filename keenscr.bin. It's important that you keep this filename (overwriting the existing one). After you exit TheDraw and KeenScr notifies you that the file has been updated.
Importing
After saving, you must then copy 4msc0000.bin back into your "EGA" folder. Rename 4msc0000.bin back to ck4_ansi_endgame.bin, then import using uGrab.
You must also copy CK4LOAD.BIN into your "Keen4mod" folder.
Edit your patch file to include the patch for the respective episode:
%patchfile $1fe47 ck4load.bin

%patchfile $20cd7 ck5load.bin

%patchfile $1fca7 ck6load.bin
Credits For This Tutorial
- Written and Assembled by Ceilick
- Revised by Nisaba
- Selections of Leandrotlz's The Draw/Keenscr tutorial
- _mr_m_'s IMF guide
